
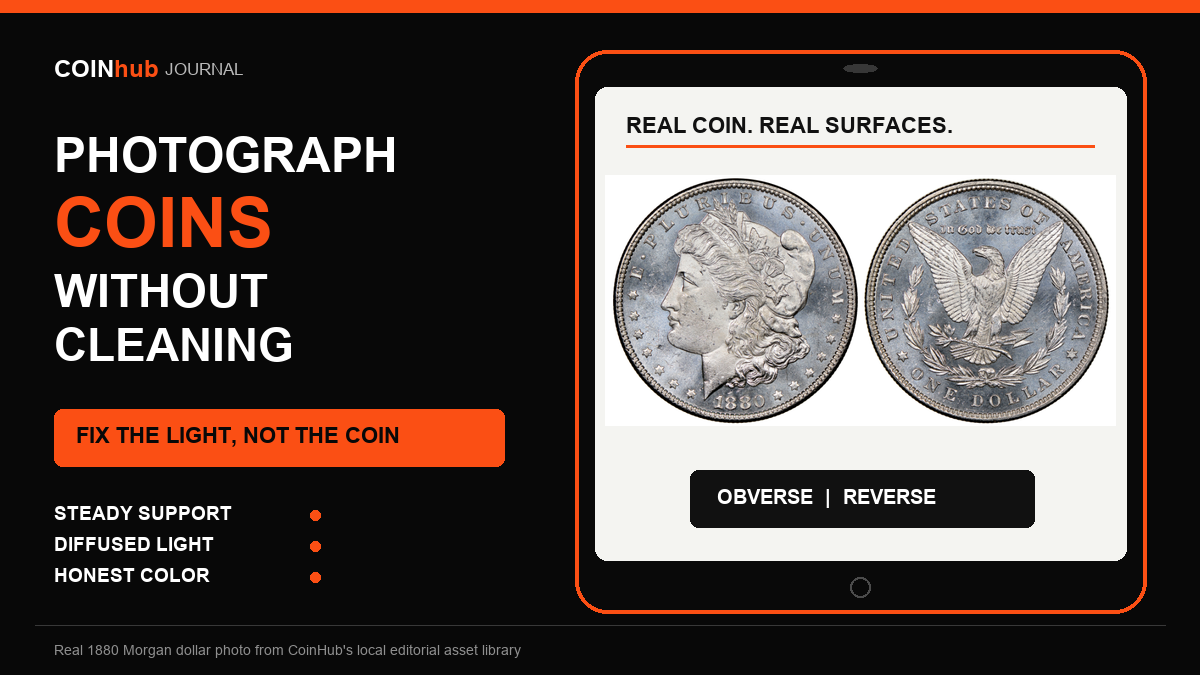
Why you should photograph a coin without cleaning it
A dark, toned, or dusty-looking coin can tempt a new collector to wipe it before taking a picture. That is the wrong problem to solve. A photograph can be retaken; an altered surface cannot be made original again.
The U.S. Mint advises collectors to handle coins by the edges over a soft surface and warns that polishing or cleaning can reduce value. The American Numismatic Association gives the same broad collector answer: do not clean a coin simply to make it bright. A wiped coin may look shinier to a camera while losing the luster, texture, and originality that collectors need to judge.
Good coin photography is not about making a coin look newer. It is about accurately recording the coin that exists: color, wear, luster, marks, toning, strike, rims, and all.
A ten-minute phone or camera setup
NGC divides the basic equipment into three useful groups: lighting, camera support, and camera or lens. That order is revealing. A modern phone can make a clear identification photo, but even an expensive camera will struggle under direct flash, mixed room light, or an unsteady hand.
- Prepare a safe work area. Use a stable table away from food and drinks. Place a clean, soft pad below the coin in case it slips. Leave certified coins sealed in their holders and keep original Mint packaging intact.
- Clean only the photography equipment. Wipe the phone or camera lens with the proper lens cloth. Remove lint from the background and fingerprints from the outside of a holder only when that can be done without opening or stressing it. Leave the coin's metal surface alone.
- Support the camera. Use a tripod, copy stand, phone clamp, or another secure support directly above the coin. Turn on a two-second timer or remote shutter so touching the device does not blur the frame.
- Use a neutral background. Matte gray, black, or white card works well. Pick one that separates the rim from the background without creating a false color cast. Avoid textured fabric that competes with small details.
- Add diffused continuous light. Start with one or two lamps placed above and to the sides. Put a proper diffuser or softbox between the light and the coin, keeping heat-producing material safely away from bulbs. Turn off unrelated room lights if their color or reflections contaminate the image.
- Keep the lens parallel to the coin. Center the coin and keep the device square to its face. Move the camera farther away and use optical or macro capability when available instead of placing a wide-angle phone lens almost against the coin.
- Focus and expose for the metal. Tap the coin on a phone screen or focus manually on the main design. Lower exposure if silver or a proof surface loses detail in white glare. Use the lowest practical ISO on a supported camera for cleaner detail.
- Set honest color. Use one type of light and a matching white-balance setting. Compare the screen with the coin under the same neutral light. Copper should not become redder and silver should not become blue or gold merely because a filter looks dramatic.
Move the light before you move the coin
Coins are reflective relief objects, so a small change in light angle can completely change what the camera records. PCGS numismatic photographer Phil Arnold describes working with light direction, reflectors, coin angle, distance, and exposure rather than relying on one fixed formula.
For a practical home setup, leave the coin and camera aligned and make small changes to the lamps first. Raise a lamp to brighten fields more evenly. Lower it to reveal relief. Move it around the clock face to control where highlights travel. A white card opposite the lamp can fill a dark area without adding a second harsh reflection.
How to photograph raw coins safely
A raw coin is not sealed in a third-party grading holder. If it must be moved, handle it only by the edge, keep your fingers off both faces, and work over the soft pad. The U.S. Mint recommends edge handling and protective gloves; whichever handling method you use, make control and a short drop distance the priorities.
Set the coin flat in an inert holder or on the prepared surface. Do not balance it on an unsafe prop for a dramatic angle. Photograph one side, turn it by the edge, and photograph the other side with the same camera height, magnification, exposure, and white balance. Consistency makes side-by-side comparison more useful.
For a valuable coin, add an edge photograph without forcing the coin out of a tight holder. The edge can document reeding, lettering, seams, damage, or an unusual planchet. If a safe edge view is not possible, do not risk the coin for the picture.
How to photograph slabbed coins
Do not remove a professionally graded coin from its sealed slab. First take a full-holder photograph showing the coin, service, grade, certification number, and label. Then make closer obverse and reverse images through the clear viewing area.
Plastic adds reflections that the raw coin does not have. Move the lamps outward, enlarge the diffusion, and block bright objects that the holder mirrors. PCGS notes that diffused daylight-balanced light and matching white balance help with holder photography. A slight change in the light or camera distance is usually safer than tilting the slab until the coin looks distorted.
Check focus on the coin, not just on printed label text or surface scratches in the plastic. If the holder itself has scuffs, include a straight-on record image and disclose that the mark is on the plastic when selling.
The complete coin photo set for selling or records
One attractive obverse image is not a complete record. A useful photo set answers the questions a buyer, insurer, dealer, or future owner would ask before the coin leaves your desk.
| Photo | What it should show | Why it matters |
|---|---|---|
| Full obverse | The entire front, centered and in focus, with the rim visible. | Documents date, portrait, mint mark when applicable, wear, color, and major marks. |
| Full reverse | The entire back under matching scale, exposure, and color. | Prevents a strong side from hiding a weaker side and records reverse diagnostics. |
| Angled-light views | Surface behavior under a second controlled light angle. | Can reveal luster, hairlines, wipes, scratches, or prooflike reflections. |
| Edge and rims | Reeding, lettering, damage, clips, seams, or other relevant features. | Records an area that face-on images cannot show. |
| Diagnostic close-up | A mint mark, variety marker, error, scratch, spot, or other important detail. | Lets the viewer assess the exact claim rather than rely on a description. |
| Holder and label | The complete slab, insert, certification number, or original Mint packaging. | Connects the close-ups to the exact item and its documentation. |
eBay's current seller guidance similarly emphasizes clear, high-resolution photos of the actual item, multiple angles, stable support, no direct flash, and close-ups of flaws. Its recommended listing size is about 1600 by 1600 pixels. Requirements can change, so check the platform before uploading.
Editing that is useful, and editing that misleads
Reasonable editing makes the photograph easier to inspect without changing the collectible. Crop empty background, rotate in 90-degree steps, correct an obvious neutral white-balance error, and make a modest whole-image exposure adjustment. Keep an untouched original file.
Do not erase spots, smooth marks, clone out scratches, intensify toning, replace a weak date, add artificial luster, or use a beauty filter. Heavy clarity, saturation, sharpening, and high-dynamic-range effects can create edges and colors that are not on the coin. A sales image should represent the exact item and its actual condition.
Coin photography troubleshooting
| Problem | Likely cause | Safe fix |
|---|---|---|
| Bright white hotspot | Direct flash or a small bare lamp is reflecting into the lens. | Turn off flash, enlarge diffusion, and move the light farther from the lens axis. |
| Blurry lettering | Camera movement, focus error, or insufficient light. | Use a support and timer, refocus on the design, and add controlled light rather than wiping the coin. |
| Silver looks yellow or blue | Mixed light sources or incorrect white balance. | Use one light type, block ambient light, and reset white balance against a neutral reference. |
| Copper looks unnaturally red | Warm lighting, automatic enhancement, or excessive saturation. | Disable filters, use neutral light, and compare the screen with the coin before saving. |
| Coin looks flat | Light is too close to the camera axis or too even for the relief. | Move one diffused lamp slightly lower or add a separate angled-light view. |
| Part of the design is soft | Lens is not parallel or macro depth of field is too shallow. | Square the camera, increase distance, use a smaller aperture when available, or make carefully aligned focus-stacked images for records. |
| Slab reflects the room | The plastic is mirroring lights, clothing, or the camera. | Darken unrelated light sources, enlarge diffusion, and reposition lamps while keeping the label readable. |
Name and preserve the files
A clear file name turns a photograph into a useful collection record. Use a stable identifier, date, denomination, side, and view. For example: CH-0042_1880-S_Morgan_obverse_even-light.jpg and CH-0042_1880-S_Morgan_obverse_angled-light.jpg.
Keep the original files at full resolution, back them up, and attach them to the same inventory record as purchase information, weight, dimensions, certification data, and notes. Do not rely on a marketplace's resized copy as your only record.
Photographs are evidence, not a grade. Lighting can reveal useful clues, but authenticity, numerical grade, cleaning, and value may still require in-hand review. CoinHub's guide to weak strike versus wear shows why a clear image is the beginning of diagnosis rather than the final answer.
Frequently asked questions
Should I wipe dust off a coin before photographing it?
Do not wipe a collectible coin's metal surface for a photograph. Wiping can create hairlines or move grit across the coin. Clean the lens and background, adjust the light, and let the photograph record the coin honestly.
Can a phone take good coin pictures?
Yes. Stable support, close focus, controlled light, and accurate exposure usually matter more than buying a new camera. A macro-capable lens can add detail, but it does not replace good setup.
Is flash good for coin photography?
Usually not. On-camera flash tends to create a central hotspot, flatten relief, and reflect from slabs. Diffused continuous lamps are easier to position and preview.
What background is best for coins?
Use a matte neutral background that clearly separates the rim. Gray is a dependable starting point; black or white can work when they do not fool automatic exposure or color.
How many photos should a coin listing include?
At minimum, show full obverse and reverse images. Add the edge, angled-light surface views, close-ups of important flaws or diagnostics, and the full holder and label when applicable.
Can I edit coin photos before selling?
Crop, rotate, and make modest whole-image color or exposure corrections that restore accuracy. Do not remove flaws, intensify toning, add luster, or use filters that make the coin look different from the actual item.